Showing posts with label Lunch. Show all posts

Monday, 30 December 2019

GRILLED FISH / IKAN BAKAR JALAN BELLAMY

GRILLED FISH / IKAN BAKAR JALAN BELLAMY


1. I forgot when did I go to this place LOL so a few things may have changed.

2. Basically in KL there are a few spots to get decent ikan bakar (grilled fish) but here at Jalan Bellamy is considered one of the favoured spots because it's in the city centre, affordable and the food are fairly delicious.

3. The selection varies and the choices are quite ample. The sauce they use to coat the seafood before grilling is sweet, a little bit spicy and if that's not enough, they have a couple of selections of dipping sauce for you to enjoy.

4. Here's a short video of my experience there:

5. Additional information to share with you if you're planning to give this place a try:

a) The place is normally packed so come early before lunch time.
b) There are a few restaurants but one stood out to be the most packed. I suggest you try that particular one.
c) A mosque is located just in front of the restaurants thus making it convenient for Muslim customers to perform their prayers.
d) There's a stall selling durian ice cream also in front of the restaurants. BUY it. It;s delicious :P

6. Address: Lorong Bellamy & Jalan Istana, Bukit Petaling, 50460 Kuala Lumpur, Wilayah Persekutuan Kuala Lumpur

Saturday, 3 March 2018

Frozen Lunch: Chicken and Egg Wrap


In the world we are living in this day and age, all of us seem to be very busy and on the move throughout the week. Either with work or school, we sometimes find it tricky to decide on what to eat that is cheap, quick and convenient to adjust to our hectic schedules. 

Many defer to buying meals as this will save a lot of time but at the same time forgetting the extra cost they are spending and lacking the concern with the nutritional content of the food they buy. Cooking your own meal shouldn't be such a hassle if you plan it well. Plus, this will allow us to include in the healthy components to our meal and yes, this will save us a lot of money too!

Chicken and Egg Wrap is one of the perfect meals that is packed with good proteins that will fill you up instantly and last for a long time. You can make a bunch of them at one time to be frozen and you will have your meals for the week already sorted. Find out on how to do this below!


WATCH THE VIDEO ON HOW TO DO IT HERE!


INGREDIENTS


  1. 5 eggs
  2. 2 large chicken breasts
  3. 2 onions
  4. 1 large capsicum
  5. Red cabbage
  6. 1 tsp of paprika, garlic powder, cumin, salt, pepper and white pepper
  7. Olive oil
  8. 5 Tortilla bread


INSTRUCTIONS

  1. In a bowl, marinade the chicken breasts with the mixture of olive oil, paprika, garlic powder, cumin, salt and pepper. Cover the bowl with plastic wrap and let the marinade set in the fridge between 30 minutes to 2 hours.
  2. Chop onions and capsicum as well as red cabbage and set them aside.
  3. Get your pan nice and hot on medium high heat and drizzle some olive oil in the pan. Then throw in the chopped onions and capsicum. Stir once in a while and let cook till the onions are caramelised and the capsicum soften up a little bit. Set them aside.
  4. In the same pan, pour some more olive oil and grill the marinaded chicken breast for roughly 5-7 minutes on each side depending on how thick they are. Once they are cooked, take them out and set them aside to rest for a couple of minutes and start slicing them into thin strips.
  5. In the same pan again, pour a tad more olive oil and add in your eggs. Season with some salt and white pepper and start making your scrambled eggs. Once done, set them aside.
  6. Time to assemble: Place a tortilla bread on top of a piece of aluminium foil. Add a small portion of each and everything (red cabbage, onions and capsicum, chicken strips and eggs) on the tortilla and then slowly roll/fold it all together, tucking in both sides and secure the entire wrap with the aluminium foil.
  7. Repeat step 6 for the other 4 wraps.
  8. Once completed, store all the wraps in a ziploc bag. Place the bag in the freezer for your weekly consumption.


SUGGESTIONS

  1. I live in the hot tropical country of Malaysia and the frozen wraps will definitely be 'defrosted' by lunch time. If you're in the colder climate, I suggest you cover the wrap with tissue and reheat it in a microwave in your office pantry.
  2. Do not add any condiment in the wrap to be frozen as this will make the wrap soggy. Pack the condiment in a separate container and turn it as a dip for your wrap instead.
  3. You can also make your own flat bread instead of using the store-bought tortilla. The recipe for the flatbread could be read HERE.
  4. The longer you marinade the chicken, the better it will taste.
  5. The process of folding the wrap requires practice. Look on Youtube for some tutorials.


Sunday, 14 January 2018

Homemade Flour Tortillas / Flatbread


Flatbread or tortilla is said to be one of the oldest forms of bread in human history. Not only it is so quick and easy to make, but it also very delicious. It can be eaten in many ways. Whether dipping in your favourite curry gravy or turning them into a complete wrap packed with awesome flavours!

Most recipes out there include the use of oil or butter but this recipe is based on the very basic of ingredients. It's healthier and very convenient for you all to give a go at this.

You can also find the similar recipe for chapati HERE.


INGREDIENTS
  1. 2 Cups of plain flour
  2. 1 tsp of salt
  3. 1 tsp of baking powder
  4. 1 Cup of warm water


SEE THE VIDEO ON HOW TO MAKE THIS BELOW.


INSTRUCTIONS
  1. In a bowl, add in the flour together with salt and baking powder. Give a quick stir.
  2. Pour in 1/4 of the warm water and mix with the flour. Repeat this step until you use up all the water (4 times) and you'll end with a manageable sticky flour. 
  3. Knead for 5 - 10 minutes until you get a smooth soft dough.
  4. Divide the dough into 5 and let them rest in the bowl for 15 - 20 minutes, covered with a warm cloth. 
  5. On a flat surface, sprinkle some flour.
  6. Flatten the small dough and start kneading until you get a thin, round shape dough.
  7. On a medium heat, place the rolled dough on the pan.
  8. In roughly 30 seconds to a minute you'd see bubbles started to form on the dough and the colour will change.
  9. Flip and cook on the other side for another 30 seconds or so while patting down on where bubbles are formed to release the air from the bread.
  10. Done and enjoy!


SUGGESTIONS
  1. REFERRING TO STEP 2, TRUST ME, DO NOT ADD IN  THE WATER ALL AT ONCE AS THIS WILL MAKE IT VERY DIFFICULT FOR YOU TO KNEAD THE DOUGH.
  2. While kneading the dough, if you must, adjust by adding in some more flour if the dough is too sticky or add in a little bit more water if the dough is too dry.
  3. Forming the dough to a round shape requires skills and experience. Do not get frustrated if you do not end up one. It took me at least 20 attempts to be able to get one acceptable round tortilla.
  4. If you're making them in a large quantity, do cover the ones you have finished cooking under a cloth or in a container to ensure moisture of the bread won't evaporate, thus keeping them soft to eat.
  5. If you're making the breads for later consumption, keep them in an air tight sealed bag and store them in the fridge. 

Thursday, 28 December 2017

SPICY FRIED RICE – NASI GORENG CILI PADI


Fried rice is a very common dish throughout most parts of Asia. It is the best way to reuse leftover cooked rice. There are no limits on what you can put into the dish. You can choose to put any proteins or vegetables you desire that will make this dish as one complete meal. Fried rice has so many varieties. Some are mild in flavour, and some are spicy – just like how many Malaysians love to have their fried rice. This spicy fried rice recipe is one of Malaysians favourites. It is spicy of course but what’s best about this recipe is how easy and simple it is for one to cook. There are of course other more ingredients can be incorporated into this dish to elevate it to the next level, but this is for us lazy bums out there who want to have something delicious but very simple to make.


INGREDIENTS

  • Cooked rice – from a cup of uncooked rice
  • 1 shallot, 7 cloves of garlic and 7 bird’s eyes chilies - pounded/blended
  • 1 tsp of fish sauce
  • 1 egg
  • Few strips of boneless chicken – chopped
  • Half a handful of dried anchovies
  • Cabbage – roughly chopped
  • 4 tbsp of oil
  • Salt and pepper for seasoning


INSTRUCTIONS

  1. Cook rice and let it cool down for a bit.
  2. Heat wok with vegetable oil on medium heat.
  3. Fry the dried anchovies and once cooked, take it out and let it sit on a plate to be used later.
  4. Put in your pounded/blended shallot, garlic and bird’s eyes chilies into the wok and stir for a couple   of minutes.
  5. Add in the chopped chicken and stir until they are cooked. Pour in the fish sauce and mix.
  6. Set the chicken to one side of the wok. Add in one egg.
  7. Season with salt and pepper.
  8. Put in the cooked rice and mix.
  9. Add chopped cabbage and the fried dried anchovies and mix everything together well.
  10. Serve and enjoy.

Watch the video on how to make this HERE!


  • This recipe is for 2 portions of serving.
  • Suggestion: Have this dish with an additional fried egg and some fried fish crackers!
  • Bear in mind, that this dish is quite spicy. So if you can’t handle the heat, please omit or reduce the use of the bird’s eyes chillies. You can add more if you want it to be spicier!
  • You can always use other kinds of vegetables such as carrots and green peas.
  • It would be nicer to use prawns instead of chicken.
  • If you want a touch of sweetness to the dish, you can include about a tbsp of sweet soy sauce.

Saturday, 25 November 2017

Langkawi Holiday Day 2, Part 2.


11th August 2017. Day 2, Part 2.


At the motel, it took us quite a while to shower, pray and rest for a little bit before going out for lunch. It was only until around 2.30 pm, that we were all ready to head to Laman Padi for lunch. And as I mentioned in my last post, the island hopping activity that morning made us extremely hungry.
We arrived at Laman Padi and noticed there were not many cars parked at their parking space. We were quite baffled, whether it was still open or whether we had driven to the wrong entrance. Luckily I saw somebody there and he confirmed that the restaurant was located at the back of the building.


The entrance


FYI, Laman Padi does not only consist of a restaurant but actually the main attraction there is the museum. More information on the location and reviews of Laman Padi could be read here.
At that time we were the only ones there. I was feeling a bit doubtful. I asked myself; “I thought this is a popular spot to eat in Langkawi. Why aren’t there anyone around? Is the food any good?” Well, this was most probably because we were there at 3 pm for LUNCH – who eats lunch at 3, right? Haha.


The place looked nice and cosy. It had an indoor area where you can enjoy your meal but the main attraction there was the small ‘huts’ (I don’t know the actual term for it) located outdoors. The ‘huts’ were placed over the green paddy field. The view was lush and the ‘huts’ were perfect for families or group of friends like us (could fit up to 8 people) to have a private meal together. So we chose to have lunch at that spot!


The main dining area


Path leading to the 'huts'

We picked this one! Had a fan too!


We ordered a set meal and it cost us around RM80 for it. The food looked delish! Also, we love how they put everything together in a huge plate. With the ambience – sitting on the floor, surrounded by the green paddy field with the wind blowing softly made us feel like we were in the kampung (village). I loved it. However, the management should really think of refurbishing the place to make it well maintained and stand out a little bit more.


Yummy!


Would be nice to have meals with this view once in a while :)


We ate like cavemen that had been out hunting since dawn LOL. Don’t judge us! The last time we ate was the 7 am breakfast! The dishes were simple, but tasty! With a little bit of this and a little bit of that, we really liked it. They were all dishes of what we usually have at home. Like I said just now, we didn’t feel like we were eating at a restaurant, but at our kampung backyard! It was indeed a very nice experience.


Minutes later, we were all full and satisfied! The next thing to do was to get to our next destination: The Upsidow.


…………………………………………………………………………………………………………


The Upsidow is an upside down concept house and one of the latest attractions in Langkawi. My ex-colleague, Ayu who moved to Langkawi mid last year, had been working there and been directly involved with the establishment of Upsidow.


Initially I just wanted to make a quick stop and see her for a bit. It was a working day and I didn’t want us to get in her way doing her job. But, knowing that I was there on the island, she invited my friends and me to check the project out.


Upsidow!


As we arrived at there – easy to find once you spot the big white contena with a huge Upsidow signboard written across it, I immediately looked for her. She was at one of the stalls and she came out once spotted me getting out of the car. I hadn’t seen her in months! I missed her. She was the person that I used to talk a lot with when I first joined the company that I am working at. So her departure from the company was a bummer.


I smiled and gave her a hug! Ayu, being her usual self was so welcoming and friendly. She could be a bit direct as well and she didn’t seemed to change – except that she had gotten a little bit tanned and thinner.


She then took the time to explain a little bit about Upsidow – how the work started and all. She also shared some stories about living AND WORKING in Langkawi which I didn’t intend to share here. Hehe.


After catching up for about 20 minutes, she invited us in to the building. The ticket price was RM 25 per adult – I know it may seemed a bit pricey but honest to God, it was worth it! When we got inside I was just amazed with how everything was structured and set out. It was consisted of two levels and the decoration was like a really nice home.


There was also a family who were there with us and the kids seemed really excited with everything they were seeing. I totally recommend to visit this place. A nice activity rather than just enjoying the beach hehe.  


My first time entering an upside down concept house. I was hoping none of these would fell off on me LOL


The interior of the house was cool! Even more lavish than mine LOL


One of the staff really caught my attention. She was an intern from the International Islamic University. She was very friendly and she really took the effort to make sure we were enjoying ourselves there. She even ‘forced’ me to get some photos taken. Hehe I even put up a good word for her to Ayu. I wanted to acknowledge the good and positive things done by her so that others could follow.  


It was taking us longer than I had planned for us to be there. I was excited to see the Upsidow but my friends…. my dear friends acted as if they had never seen anything that was upside down before! They were like kids. Maybe they had forgotten that they‘re in their late 20s :P. But that was just a proof that Ayu and her team made a really good job working on the project. For more information and feedback on Upsidow, you could read here.


I should learn how to use at oilet properly :P


Snap ...


... and rotate twice. Btw this is how I feel everytime I'm sleepy at work. Bed... unreachable...


Snap ...

... and rotate twice. My favourite part of the house.


We had nothing planned after that. But it was getting late so we thought it’d be best to head back to the motel and rest a bit before dinner time. But we decided to make a quick stop to shop a few gamat (sea cucumber) products to bring home. If you are not aware of what gamat is, you can have a quick read here.


Sad to say goodbye to Ayu. Proud of what she did with this place!


...................................................................................................................................................................


“Hmmm the shopping begins,” I said to myself. There were tonnes of products from soaps, shampoo, to male enhancement products. I had a few stuff to buy for my mom and girlfriend. Buying stuff for my mom was easy – she told me specifically what she wanted. But I had to make a couple of returns to the shop as my girlfriend kept on adding the products for me to get her – initially she asked me to buy 2 – 3 items, but I ended up buying 7 different items. Hehehe #SheControlsMe #IAmPowerless #GrumpyIlyEqualsDangerousIly


This size will last for 5 zillion years I guess


I know what you're thinking: No, the pharaohs did not build this.

Minyak Belacak - google what this is for. Go ahead.

Minyak Lintah - google for this one as well. 


After shopping we headed back to the motel to change and pray. Around 8.30 pm we all got together again and took a walk in Chenang again. No shopping that night. Just enjoying the nightlife a bit. We even entered Chenang Mall just to see what it was like there.  


We had no dinner plans – we weren’t really that hungry as we had a late lunch. But we HAD to eat or we’d starve in the middle of the night. We thought it over McDonalds’ Sundae Cone (somehow it cost a few cents more in Chenang compared to KL). Before that in Chenang Mall, we were contemplating whether we should just settle for KFC, but no one budged to make the first move haha. We then crossed by a Ramly burger truck and agreed to have dinner there. Once in a while, when you had no idea on what to eat, a Ramly burger would always be one of the best choices for food. Quick, simple and delicious!


After dinner, we walked back to the motel and before we call it a night we sat down together to share photos taken for that day – as per the night before.


…………………………………………………………………………………………………………


The second day was very productive and the most definitely fun. I really enjoyed every bit of the activities we had gone through. If I were to leave Langkawi that night, I’d be all satisfied and happy. But, we still have the third day. The final day. We saved that for a lot of chocolate shopping. Trust me. More on that, later.


To be continued …

Monday, 23 January 2017


Easy To Make, Healthy, Delicious, Budget Chicken Wrap Recipe


It’s healthy, fulfilling, easy to make and most importantly, delicious. With a few basic easy – to – get ingredients, you’ll be able to make your very own chicken wrap!


Most of us have the regular 9 to 5 working hours and spend most of the hours sitting at our desks. We are always occupied with all the paperwork, spreadsheets, returning emails and so on and so forth. 


When it comes to our lunch break, we tend to settle on having our lunch at the restaurant nearby or worse – at a fast food chain. The appetite we build from the hectic morning will highly lead us to choose meals that are unhealthy and costly as well – you could easily spend RM20 per meal in KL.


If you keep record of the unhealthy meals you devoured and its costs in a month, you’d be shocked of how unhealthy they are and how costly they add up to your monthly expenses. Unhealthy and expensive, definitely a lose – lose!


There are many recipes out there that offer wide selection of healthy and budget meals and yes, these healthy and budget meals can be tasty and very simple and quick to prepare too! One of them is the chicken wrap!  

With around RM25/week and 30 - 45 minutes of your time a day, you can enjoy these amazing healthy wraps throughout your entire work week without any guilt.

Here’s how you make them;


Ingredients (to make one chicken wrap)


 A. For the marinade:

·         1/3 of a medium chicken breast – cut to strips or pieces
·         1 tsp of cumin
·         ½ tsp of garlic salt
·         ½ tsp of salt
·         ½ tsp of pepper
·         ½ tsp of paprika


 B. Vegetables:

·         Few leaves of Romaine lettuce
·         4-5 cherry tomatoes
·         Half of medium-sized onion


 C. Others:
·         Flatbread– for homemade healthy, simple recipe, get recipe at http://faezwriteshere.blogspot.my/2017/01/cheap-simple-healthy-and-delicious.html
·         Dressings or condiments of your choice (preferably low calorie, low salt, low fat)
·         Olive oil for cooking


Steps
1.    Mix all of the ingredients from A and let them marinade in the fridge for at least 20 minutes - I usually do it overnight for maximum flavour. Also, make sure the chicken is dry. You could also add in a little bit of olive oil to help the spices to coat evenly.

Cover with plastic wrap!


2.     While the chicken is marinating, slice some onions and cherry tomatoes.

3.     Heat a non-stick pan on medium heat and add in about a table spoon of olive oil. Once hot, toss in the sliced onions and cherry tomatoes in the pan. Wait for about 3-5 minutes or till they are all soft.

Wait until they have soften


4.     While waiting for the vegetables to soften up, place a flatbread on an aluminium foil (shiny side faced up). Roughly tear some romaine lettuce and place it on the centre of the flatbread.

Leave some gaps at the two sides of the bread


5.     Remove the onions and cherry tomatoes aside and place in the chicken marinade on the pan – you may need to add a little bit more olive oil to the pan. Cook the chicken around 3 minutes on each side.

Make sure they are cooked through


6.     Once the chicken is cooked all the way through, add the onions and cherry tomatoes in with the chicken and give it a quick mix. I roughly mash everything up the to smaller pieces simply to better infuse the flavours of the vegetables with the chicken.

Mash and mix!


7.    Then place every-single-bit that is in the pan onto the flatbread.

8.    Add in your choice of dressings/condiments/sauce.

The fun part: assembling this bad boy!


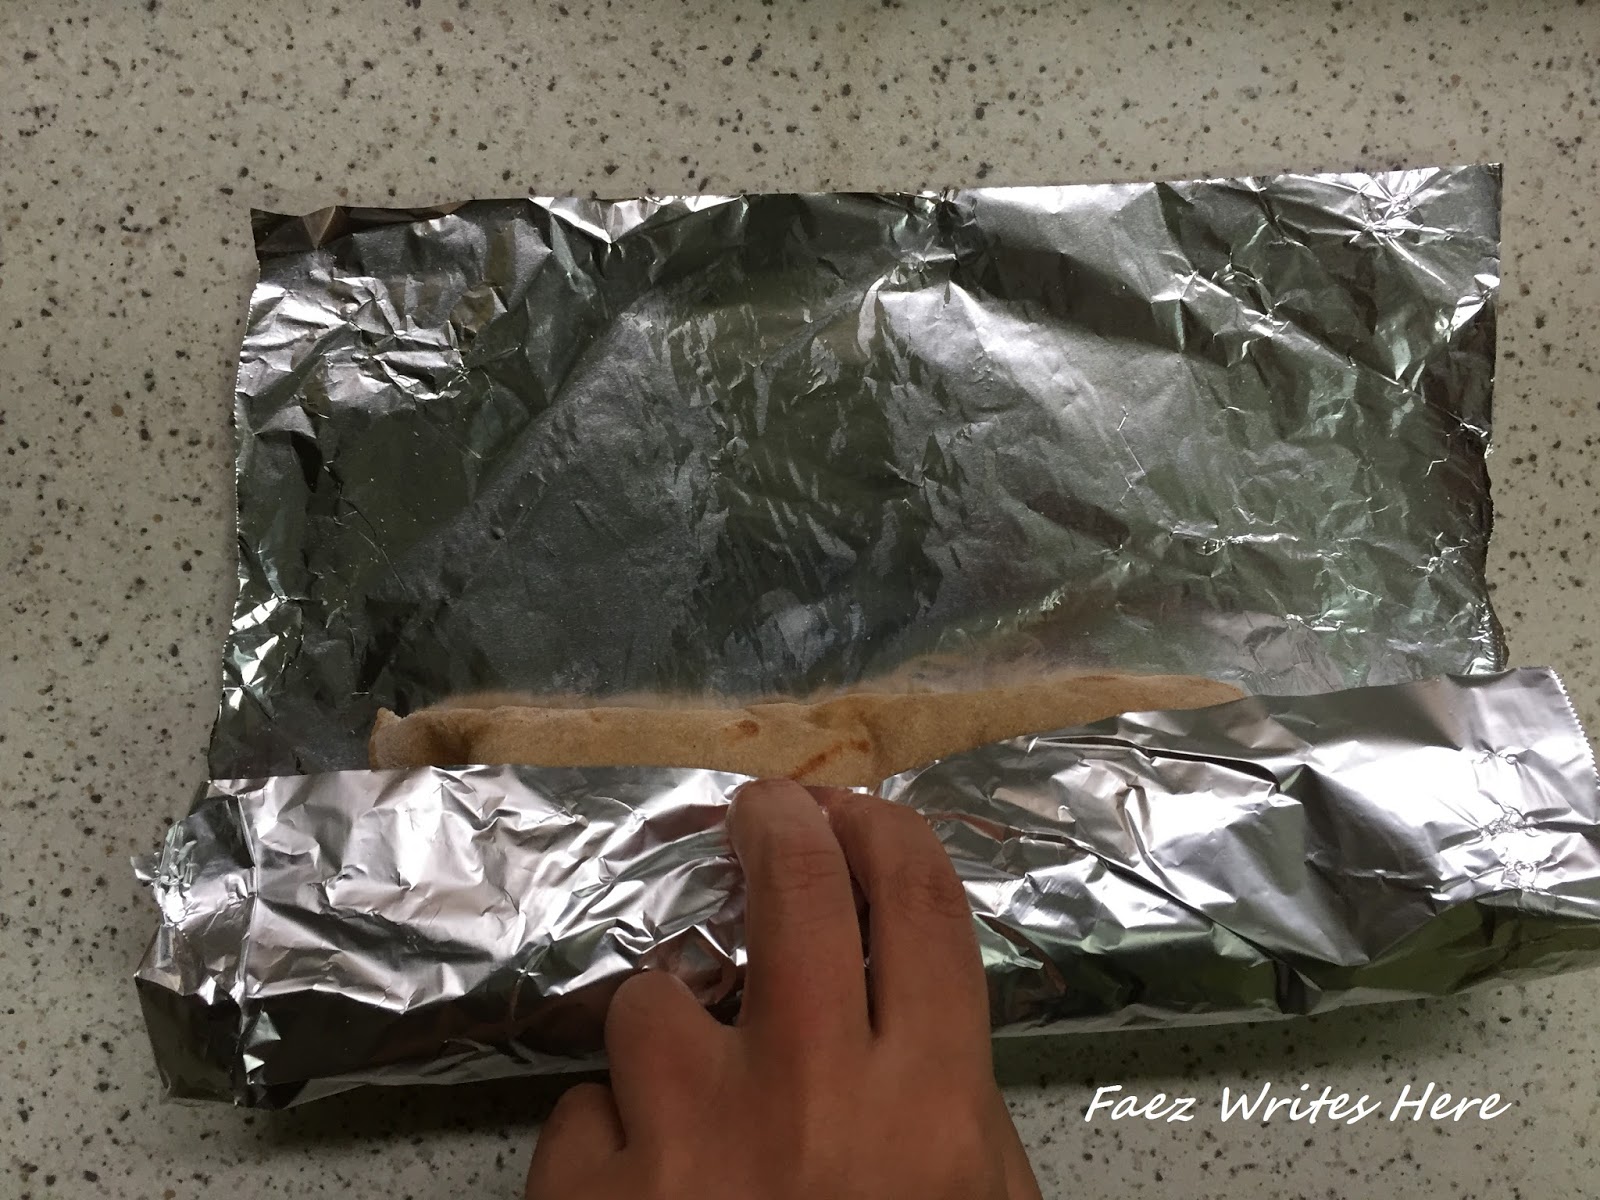
9.    Fold two opposite sides of the bread over the filling. Then, as best as you can, carefully wrap the bread (with the foil) and make sure you get all the filling inside the wrap. Finally, tuck in the two end of the foil to secure the wrap.

Fold both sides in

Roll them over


10.  Done! So all you need to do, is put it in the fridge before taking it to work the next day!

One amazing wrap, rich with flavour, done!


As you can see, it’s a pretty straightforward and simple recipe. But the flavours that you get is amazing! One of the best things about the wrap is that you can totally experiment it with muchly any spices you like – coriander, curry powder, turmeric powder etc. and top it with any other vegetables you love - bell pepper, chilli, herbs etc. You can even use different kinds of protein sources – beef, eggs etc., heck, you can even make a vegetarian wrap with humus spread! The alternatives are limitless. Adjust them to your taste but just make sure you stick to the healthy side!

Give this recipe a try! With under 45 minutes and minimum effort, you’ll get a decent, delicious, healthy and budget meal!